Manta Photography Tips Komodo: Mastering Your Camera at Manta Point
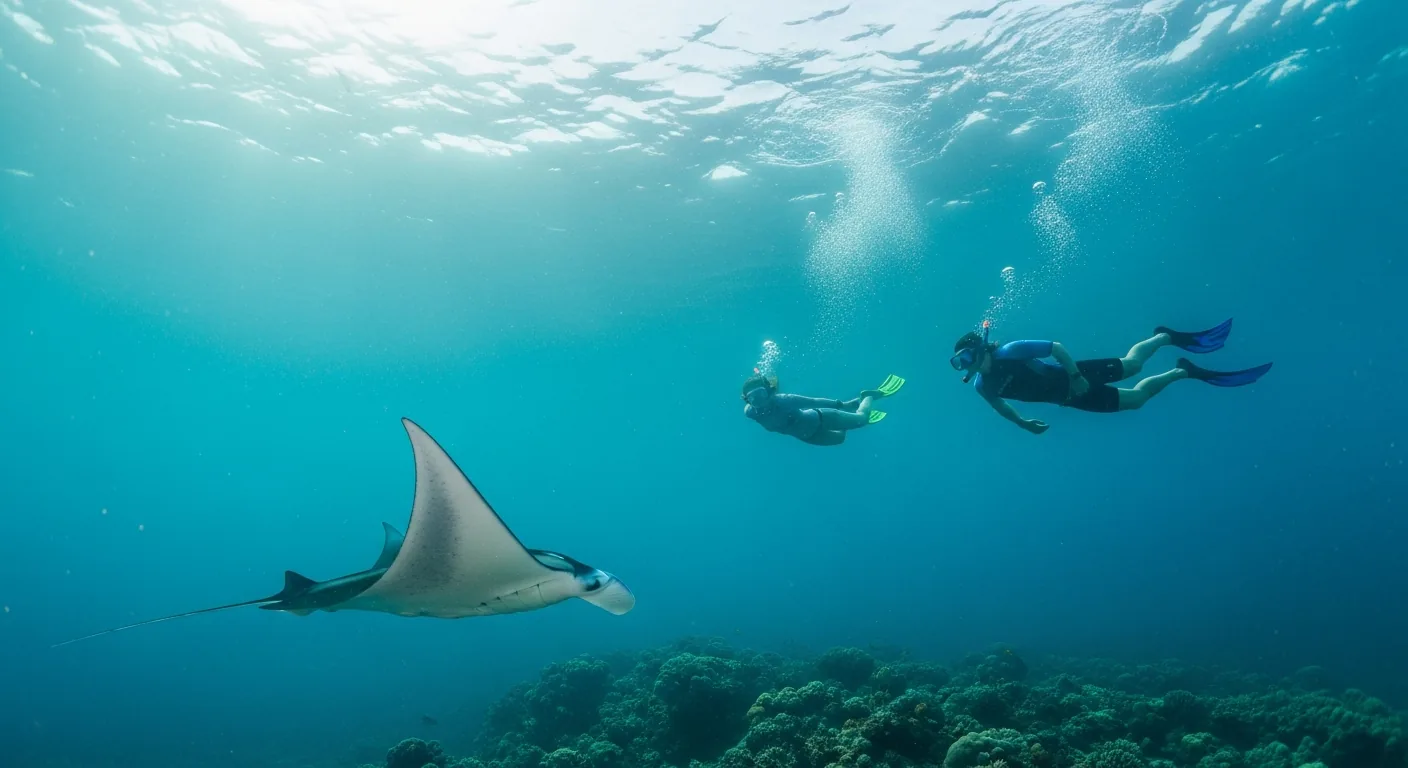
The water is a brilliant, almost impossible cyan. Below, the current combs through a vast field of coral rubble, a seemingly plain stage for the spectacle to come. You drift, weightless, your eyes scanning the blue haze where the sea floor meets the horizon. Then, a flicker. A distant, dark shape resolves itself from the background. It is not swimming; it is soaring. A reef manta, five meters from wingtip to wingtip, glides effortlessly into view, a living delta wing of sublime grace. You raise your camera, heart accelerating with the current. This is the moment. And the problem becomes immediately, technically apparent: how does one capture the profound elegance of this creature in a dynamic, light-filled, and fluid environment? Freezing this moment at Manta Point Komodo requires more than luck; it demands preparation, technique, and an understanding of the forces at play. See also: Contact pricing.
The challenge for any photographer, from the enthusiast with a new housing to the seasoned professional, is translating the three-dimensional ballet of a komodo manta dive into a static, two-dimensional image that conveys the scale and spirit of the encounter. The swift currents of Karang Makassar, the variable light, and the animal’s own unpredictable flight path are all elements that must be managed through deliberate choices in gear, settings, and conduct. This is not just about taking a picture; it’s about creating a portrait.
The Komodo Manta Dive: Understanding Karang Makassar’s Unique Environment
The iconic site known as Manta Point Komodo is, on a marine chart, named Karang Makassar. It is not a conventional reef of dramatic walls or kaleidoscopic coral gardens. Instead, it is a vast, submerged channel, an underwater plain of sand and coral rubble stretching for several kilometers. Its seemingly unremarkable topography is precisely its secret. This channel acts as a funnel within the Lintah Strait, concentrating the powerful currents that flow between the Flores Sea and the Indian Ocean. These currents, which can regularly exceed 4 knots, are the engine of this ecosystem. See also: see Manta Point Komodo’s About.
They carry a constant, dense supply of plankton, the primary food source for reef mantas (Mobula alfredi). The mantas congregate here to feed, socialize, and visit “cleaning stations”—specific coral bommies where small wrasse and other fish perform a vital service, removing parasites from the mantas’ skin and gills. The entire experience at Karang Makassar Komodo is defined by this current. Divers and snorkelers do not swim; they drift. A day trip focused on a komodo manta dive or a komodo manta snorkel here is an exercise in controlled surrender, using the current as a conveyor belt through one of the planet’s most significant manta ray aggregations. The shallow depths, typically ranging from 5 to 15 meters (16 to 50 feet), allow for long bottom times and make the site accessible to snorkelers, who can witness the spectacle from the surface. The photographic challenge, therefore, is to remain stable and compose a shot while moving at the speed of the sea.
Gearing Up: The Photographer’s Kit for Manta Point Komodo
Selecting the right equipment is the first critical step toward capturing compelling images at Karang Makassar. The combination of large subjects, variable water clarity, and the need for maneuverability in a strong current dictates a specific approach to camera systems, lenses, and lighting. See also: Manjarite Manta Snorkel.
According to marine photographer and conservationist Dr. Elena Pascale, “The single most important piece of gear for manta photography, after the camera itself, is a wide-angle lens. You need to get close to your subject to reduce the amount of water between the lens and the manta. Water diffuses light and color. The closer you are, the sharper and more vibrant your image will be. A wide-angle or fisheye lens allows you to fill the frame with a five-meter animal while being only a few meters away.” See also: Manta Point Komodo Home.
Your choice of system will depend on budget and experience, but each has its merits for a komodo manta dive.
- Compact Systems: High-end compacts like the Olympus Tough TG-6 (camera body approx. $450 USD) paired with a wide-angle wet lens offer an accessible entry point. They are small, easy to handle in a current, and produce excellent results in the bright, shallow conditions of Karang Makassar.
- Mirrorless Systems: Cameras from the Sony Alpha or Canon R series provide a significant jump in image quality and versatility. The ability to use superior lenses, like a fisheye, opens up more creative possibilities. These are the workhorses for most serious underwater photographers.
- DSLR/Professional Systems: While bulkier, a full-frame DSLR or mirrorless camera in a high-end housing from Nauticam or Aquatica (housings alone can cost upwards of $3,000 USD) delivers the highest image quality, dynamic range, and autofocus performance. This is the choice for those for whom compromise is not an option.
Comparative Camera Systems for Karang Makassar
| System Type | Pros | Cons | Estimated Cost (USD, body + housing) |
|---|---|---|---|
| High-End Compact | Small, lightweight, affordable, easy to use | Lower image quality, limited lens choice | $800 – $1,500 |
| Mirrorless (APS-C/Full-Frame) | Excellent image quality, interchangeable lenses, fast AF | More expensive, larger than compacts | $2,500 – $6,000 |
| DSLR/Professional | Peak image quality and performance, robust | Bulky, heavy, highest cost | $5,000 – $12,000+ |
Lighting is another key consideration. While the shallow, sunlit waters of Karang Makassar Komodo—blessed by over 300 days of sunshine a year in the region—make natural light photography possible, artificial light from strobes is necessary to restore the warm colors (reds, oranges, yellows) that are absorbed by the water. A good twin-strobe setup from brands like Inon or Sea&Sea, starting around $800 USD, will allow you to illuminate the manta’s white underside and bring out the detail in its cephalic fins and gills. However, the water here can be filled with particulate, so careful strobe positioning is essential to avoid backscatter.
Dialing It In: Essential Camera Settings for Komodo Manta Photography
With your gear prepared, success at Manta Point Komodo hinges on your camera settings. The goal is to balance the bright ambient light of the sun with the artificial light from your strobes, all while freezing the motion of both the manta and yourself in the current. Shooting in Manual mode (M) is non-negotiable for achieving this control.
Here is a baseline strategy for configuring your camera for a komodo manta dive:
- Shutter Speed: This controls the ambient light and freezes motion. A faster shutter speed darkens the background and ensures a sharp manta. Start with 1/125s or 1/160s. If you are comfortable with your stability in the water, you can go faster, but be mindful of your camera’s maximum flash sync speed.
- Aperture (f-stop): This controls the light from your strobes and determines the depth of field. A mid-range aperture like f/8 or f/9 is an excellent starting point. It provides a good depth of field, keeping most of the manta in sharp focus, while still allowing enough light from your strobes to properly expose the subject.
- ISO: This controls the camera sensor’s sensitivity to light. In the bright conditions of Karang Makassar, keep your ISO as low as possible to ensure a clean, noise-free image. Start at ISO 100 or 200 and only increase it if absolutely necessary.
- Strobe Power & Position: Set your strobes to manual control. Begin at half power and adjust based on your distance to the manta. To minimize backscatter, position your strobes out wide, slightly behind your camera handles, and angled slightly outward. This lights the subject from the sides rather than straight-on, preventing the particles between your lens and the manta from being illuminated.
- Focus: Use continuous autofocus (AF-C) with a wide or zone focus area to track the moving manta. Pre-focusing on a point where you anticipate the manta will be can also be an effective technique.
These settings are a foundation. The dynamic nature of the environment requires constant adjustment. Review your images frequently on your camera’s LCD screen, check your histogram, and be prepared to tweak your settings on the fly. A successful komodo manta snorkel or dive photographer is one who is as fluid as the water itself.
The Approach: Manta Etiquette and Compositional Strategy
Technical proficiency is only half the battle. The most impactful manta photographs are born from respectful, intelligent interactions. “The biggest mistake photographers make is chasing,” says I Gede Sudarta, a dive guide with over 15 years of experience in Komodo National Park. “Mantas are curious, but they are also timid. If you charge at them, they will leave. The best technique is to become part of the landscape. Find a spot on the bottom, secure yourself against the current with a reef hook if necessary, and stay still. Let them come to you. When you are calm and non-threatening, they will often approach and perform their beautiful aerial displays right over your head.”
Adhering to the internationally recognized Manta Trust Code of Conduct is essential for both the well-being of the animals and your photographic success:
- Observe, Don’t Interact: Never touch, chase, or ride a manta ray.
- Approach with Care: Approach slowly from the side, giving the manta a clear path. Never block its movement or approach from directly above or below.
- Maintain a Respectful Distance: Stay at least 3 meters (10 feet) away. If a manta approaches you, remain still and let it dictate the encounter.
- Stay Low: When diving, remain low to the seabed. This is less intimidating for the mantas and provides a better photographic angle.
Once you are in position, focus on composition. The reef mantas (Mobula alfredi) of Komodo, with wingspans reaching up to 5.5 meters (18 feet), are magnificent subjects. To do them justice:
- Shoot Upwards: Get below the manta and angle your camera up towards the surface. This isolates the animal against a clean blue or green background and can create dramatic sunburst effects. It also avoids the visually cluttered rubble bottom of Karang Makassar Komodo.
- Fill the Frame: Use your wide-angle lens to get close and make the manta the undeniable hero of your shot. This creates impact and reveals intricate details, like the unique spot patterns on their undersides which are like a fingerprint for each individual.
- Focus on the Eye: Like any portrait, the eye is the focal point. A sharp eye creates a connection with the viewer.
- Capture Behavior: Look for moments beyond just a simple fly-by. A manta being cleaned, a chain of mantas feeding in a train, or two individuals interacting are all powerful storytelling moments.
Beyond Karang Makassar: Manjarite and Other Komodo Sites
While Manta Point is the main draw, a typical day trip from Labuan Bajo offers a more varied experience. After the exhilarating drift of a komodo manta dive, many itineraries include a stop at Manjarite Komodo. This site offers a completely different character and photographic opportunity. Manjarite is a sheltered bay with calm, clear water and a long, photogenic wooden jetty that stretches approximately 150 meters from the shore. Below the surface, sloping coral gardens are home to a wealth of macro life—nudibranchs, pipefish, and juvenile reef fish—making it an ideal location for a relaxed second dive or a leisurely snorkel. For the photographer, it’s a chance to switch to a macro lens and capture the smaller wonders of the Komodo ecosystem, providing a beautiful counterpoint to the grand scale of the mantas.
A comprehensive day trip might also include a stop at Kelor Island for a short trek and panoramic views or Kanawa Island for more pristine snorkeling. This variety ensures a rewarding day for everyone, not just the dedicated manta enthusiast. The experience of a komodo manta snorkel at Karang Makassar followed by the placid beauty of Manjarite Komodo showcases the incredible diversity of the park.
Planning Your Komodo Manta Dive Trip from Labuan Bajo
A successful photography trip to Manta Point Komodo begins with sound planning. Labuan Bajo, on the western tip of Flores island, is the gateway to Komodo National Park and the departure point for all day trips.
The best time to visit is generally during the dry season, from April to December, which offers the calmest seas and best visibility. However, manta sightings are excellent year-round. The rainy season, from January to March, can bring an increase in plankton, attracting large numbers of feeding mantas, though water clarity can be reduced. Water temperatures are consistently pleasant, ranging from 25-29°C (77-84°F).
Choosing a reputable dive operator is paramount. Look for companies with a strong safety record, experienced local guides who understand the currents and manta behavior, and a commitment to sustainable tourism practices. A standard shared speedboat day trip to the central Komodo region, including Manta Point, typically costs between $80 and $150 USD per person. This usually includes lunch, water, and snorkel gear, but dive equipment rental and park fees are often extra.
Be prepared for the Komodo National Park fees, which are subject to change. As of early 2024, fees for foreign tourists include a primary entrance fee of IDR 150,000 (~$10 USD) on weekdays and IDR 225,000 (~$15 USD) on Sundays and public holidays, in addition to various regional and activity-specific levies that can add to the total cost. Verify the current fee structure with your operator before booking.
Actionable Steps for Your Expedition:
- Assess and Prepare Your Gear: Clean your camera housing, test your strobes, and ensure you have fully charged batteries and empty memory cards.
- Practice Your Settings: If you are new to underwater photography, practice adjusting settings on land to build muscle memory.
- Study Manta Behavior: Watch documentaries and review the code of conduct. Understanding the animal leads to better photographs and more meaningful encounters.
The currents of Karang Makassar are a constant, powerful force, bringing life and opportunity to those who are prepared. Capturing the definitive image of a Komodo manta ray is a worthy challenge, a blend of art and science that rewards patience and respect. The moment that dark shadow resolves into a creature of impossible grace is waiting.
To reserve your place on a guided photography expedition to Manta Point Komodo and receive expert advice tailored to your equipment, contact our specialists. Let us handle the logistics, so you can focus on the shot.
Manta Point Komodo
Phone: +62 811-3941-4563
Email: bd@juaraholding.com
Office: Jalan Sunset Road No. 88, Kuta, Badung, Bali 80361